Home › Forums › Slot Car Talk › Tech Tips / Q & A / Tutorials › Painting a Phantom Calder BMW Art Car
- This topic has 2 replies, 2 voices, and was last updated 10 years, 4 months ago by
 BarkingSpyder.
-
AuthorPosts
-
October 7, 2015 at 8:32 PM #8327
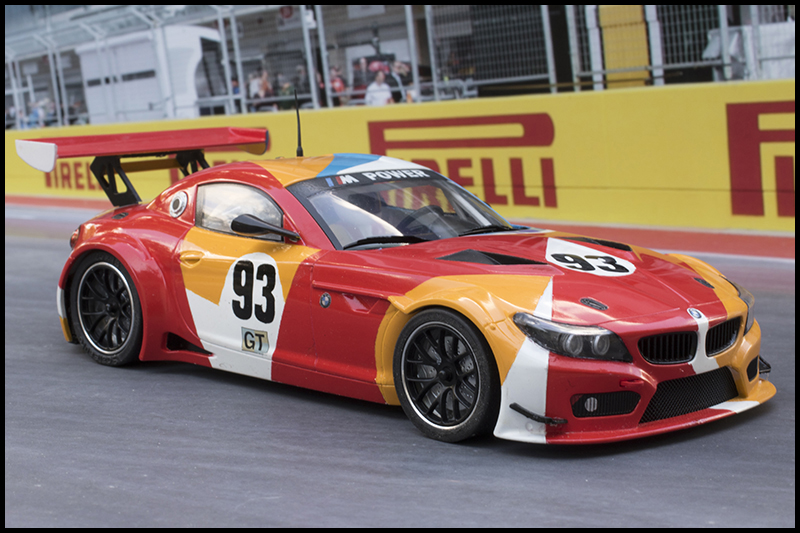
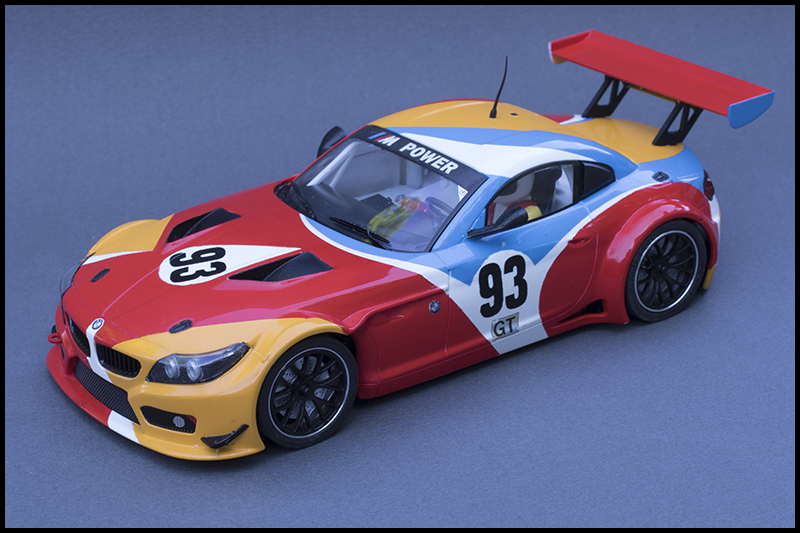
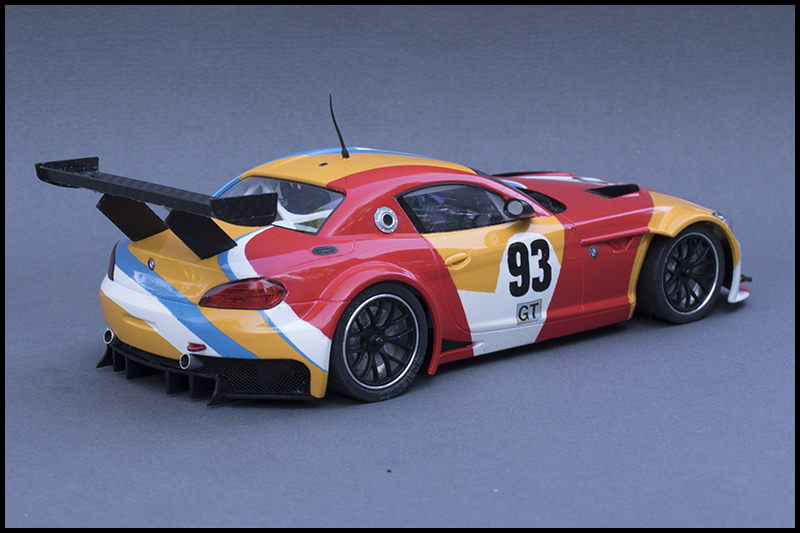
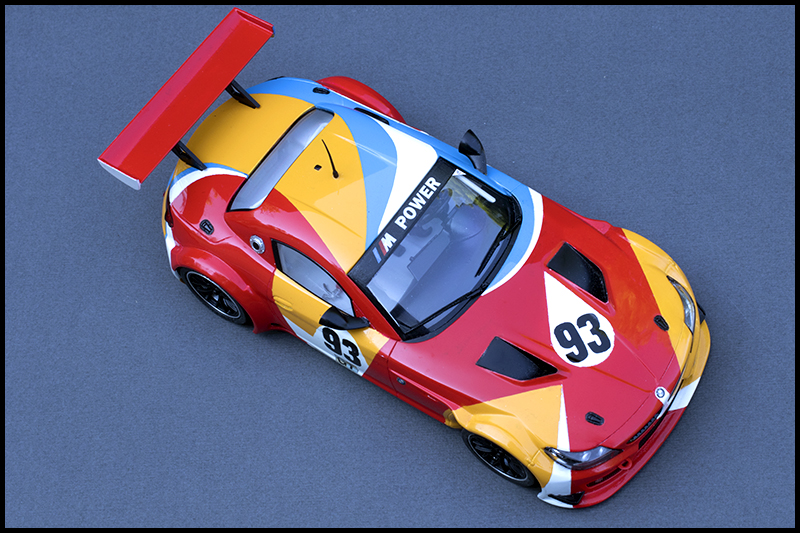
I decided to repaint my DHL BMW Z4 GT3 1/24 Scale Auto slot car in the paint scheme of the first Art Car, the 3.0 CSL painted by Alexander Calder that Herve Poulain drove in the 1975 Le Mans race. I thought that I might chronicle this repaint and the methods that I used. There are many paint products out there and many methods that will yield good results. The effort that I went to on this project might be considered overkill. Frankly, one can take a car body, dust it off, shoot a few coats of paint from a rattle can, and come out with a fairly decent paint job, especially for a car that’s going to get banged around on a slot track. I always strive for a realistic appearance on models I build. By documenting this project I hope to give others some insight into how I approach a build and the problems that I encounter, and offer some tips that might prove useful.
To start a project like this, the first thing a builder needs is reference material. I collected all the photos of the original car that I could find. It is essential to have as many views of the original vehicle as you can find. Here is the original car: https://images.search.yahoo.com/search/images;_ylt=A0SO8xLPHxNWC3gAIoJXNyoA;_ylu=X3oDMTE0OWxsNjRoBGNvbG8DZ3ExBHBvcwMxBHZ0aWQDQjA5MzRfMQRzZWMDcGl2cw–?p=Calder+BMW+Art+Car&fr=sfp&fr2=piv-web
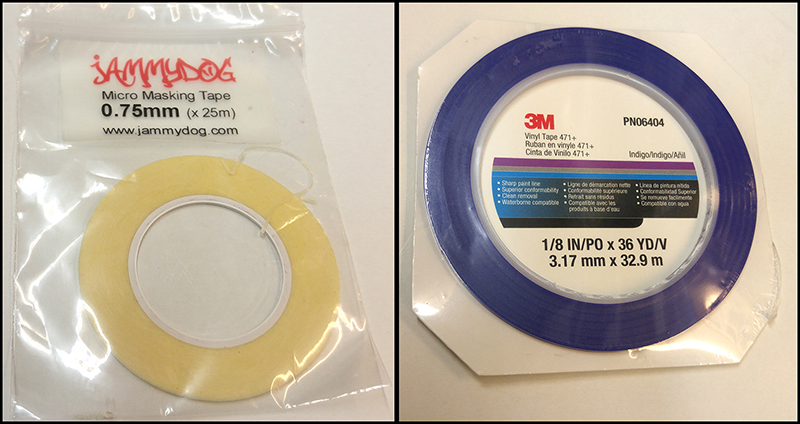
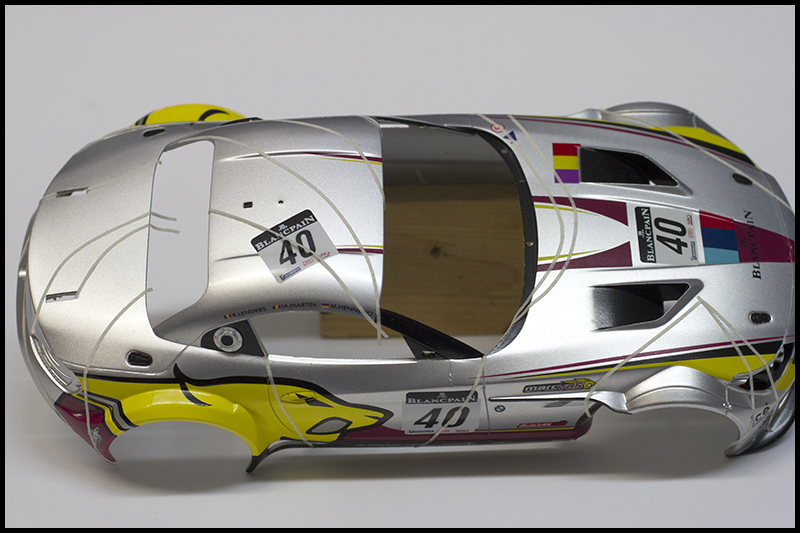
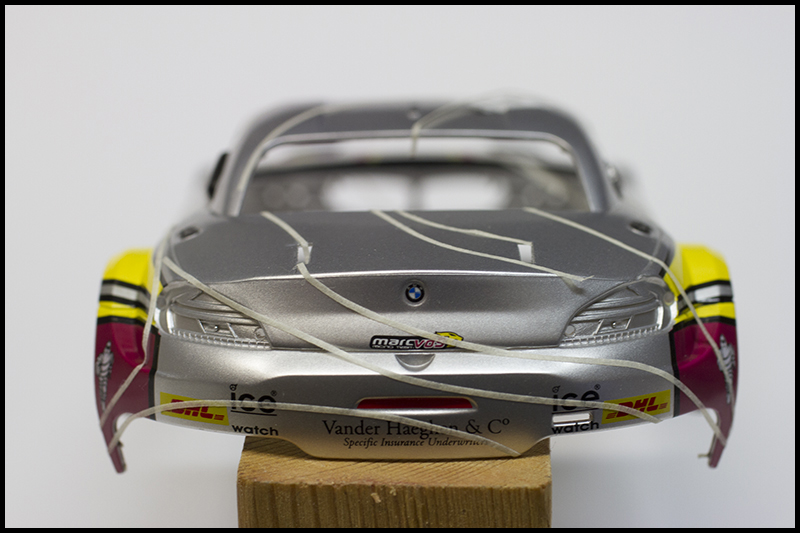
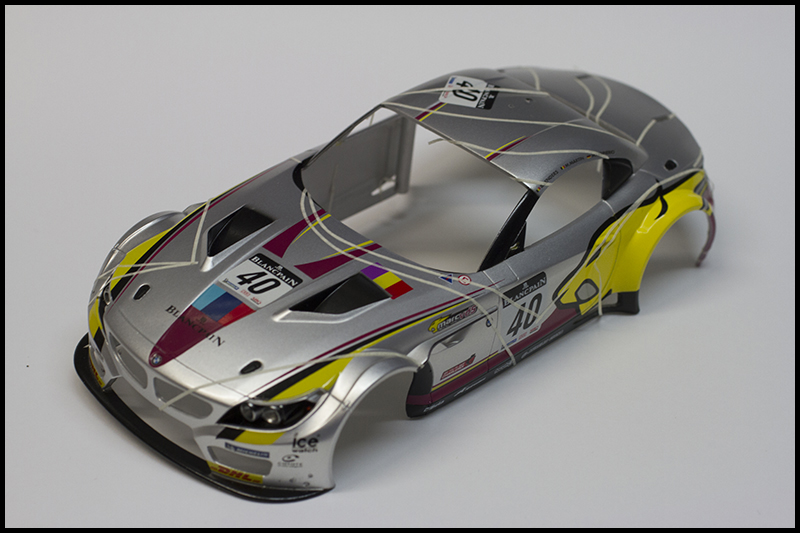
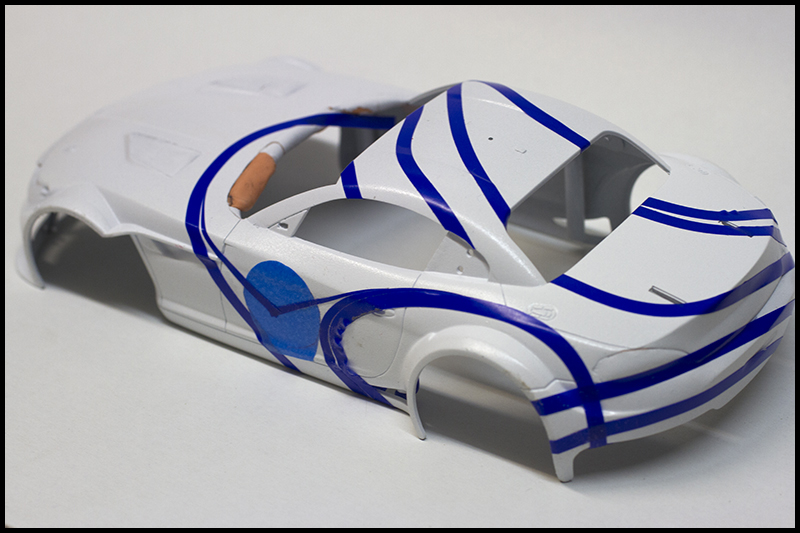
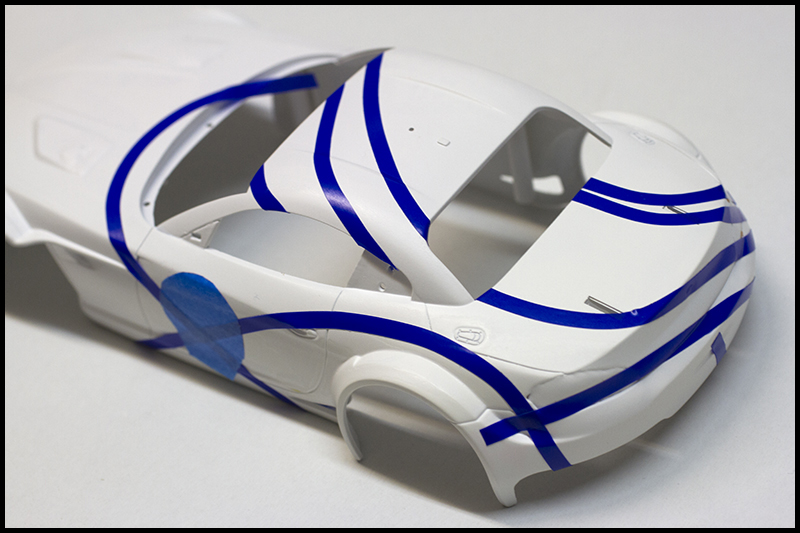
Using some .75mm Jammydog Micro Masking Tape, I started laying out the paint design on the DHL body, seeing how the original paint design on the 3.0 CSL would translate to the Z4 body. The narrow width of the Jammydog tape was useful for mocking up the paint design. I prefer 3M Vinyl Tape 471+ for the actual masking. I used nearly this whole role on this project.
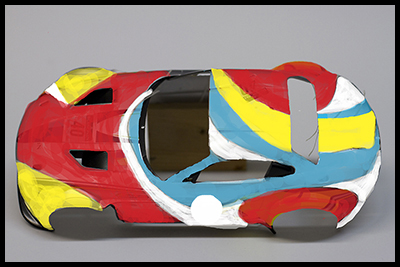
From the windshield forward the design worked well. The cabin and rear deck of the Z4 are shorter than the CSL and the body is more rounded, so some modifications would be needed. I applied the tape numerous times, peeling it off and re-applying it in different arcs and widths, trying to see what would work. During the painting process I made further changes. I took numerous photos of the body with the tape applied. I then did some crude coloring in Photoshop to see how that looked. I now had a (very) rough idea of what the body was going to look like.
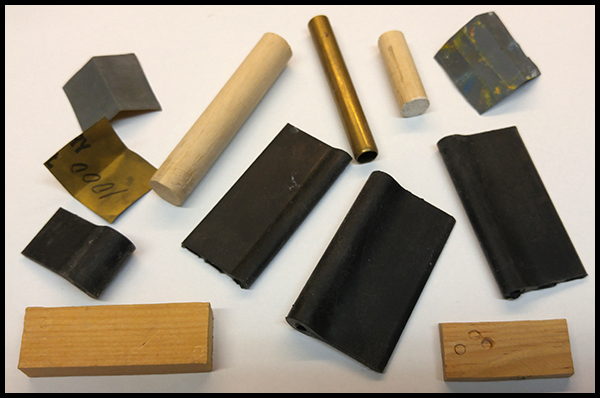
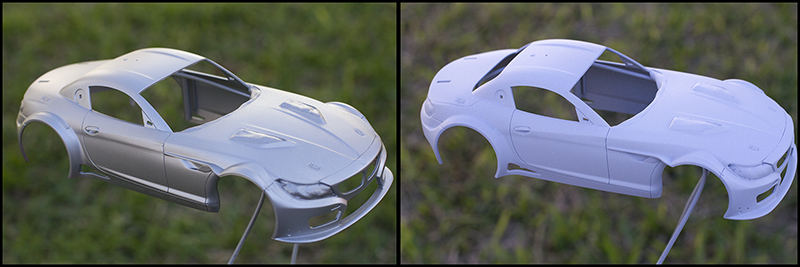
I started with a finished and painted car rather than a white body kit because I wanted the latest chassis. Besides that, I would have gone through the same pre-paint sanding on the white kit as well. After disassembling all the interior and body detail parts I started sanding the body with 1000 grit wet-dry sandpaper. This does two things: it provides “tooth” for the paint to stick to and creates a flat surface. I use a variety of small blocks of wood or plastic, dowels, and rubber sanding backers wherever possible.
I use small pieces of the sanding sheet about an inch by an inch-and-a-half. One can just use these sandpaper pieces, folded in half, and held in your fingers, but using sanding blocks can be the difference between a smooth finish and a flat finish.
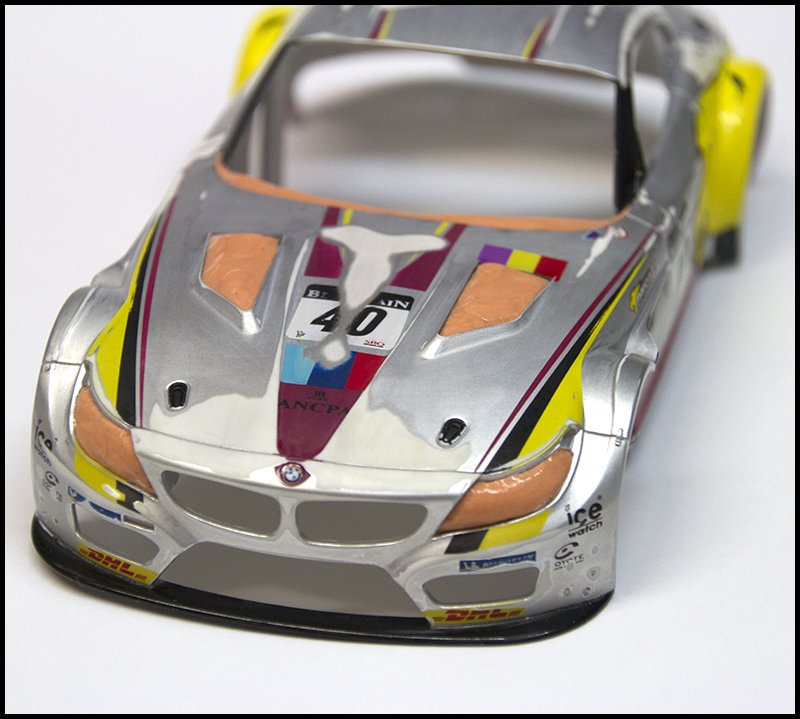
An example of this is the nose/hood intersection at the front of the car. The nose was slightly higher than the hood at their intersection. By using a small block with the sandpaper, I sanded down the area until the silver paint at the front of the hood was cut through to reveal the white plastic, uniformly, across the panel line. Since I planned on color sanding or polishing the paint, polishing the raised area of the nose would have cut through the color coat. Any places that one sees color, or gloss, where the area around is flat or body color, indicates a dip or divot. Primer paints will have some solids to help fill these small depressions, but I like to get it as flat as I can to start with.
In the photo above you can also see where I used Silly Putty to mask the hood vents, headlights, and taillights. This makes masking irregular areas very easy. You can work it with a knife blade or toothpick and it will hold its shape and remove easily. Very handy.
Be careful in sanding around any details, like hinges or marker lights that you don’t want to sand off. To play it safe, these could be taped off.
Sanding can be done either wet or dry. Wet-sanding, over a sink or a bowl of water, has the advantage of flushing off the sanding debris so it is not ground back into the surface. The disadvantage is that it is messy. When I dry-sand I put a towel across my lap and continually wipe off the sandpaper and body on the towel. Either wet or dry sanding will yield good results. I enjoy sanding (and polishing), finding it very soothing.
After sanding the entire body with the 1000 grit sandpaper, I went over it again with 1500 grit sanding paper. The paint products that I use produce very thin layers of paint, which yield realistic appearance and do not bury detail, but preparation is critical; any sanding scratches will show up.
The last step before painting is to wash the body. This is critical. It will clean all the dust, finger oil, and contaminates, from the body. I use an old toothbrush in a sink or bucket, with a little bit of Dawn dishwashing liquid. I rinse the body thoroughly and air-dry it.
For my first painting attempt I used water-based paints for my color coats. I have had very good luck in the past using some brands of water-based paints. In this case I used a brand that I had not used before. I applied a silver sealer coat and the first white color coat, both sprayed with my trusty Binks Wren single-action airbrush.
I prefer to do my spraying outside. If it is windy I will spray in my garage with the overhead door open. I do not use a spray booth, preferring to be able to hold the body in one hand, usually with a bent coat hanger holder. I can then turn the body as I need to, including upside down, in order getting the coverage I want. This is also useful if I spray too heavily and the paint starts to run. I can turn the body flat or upside down to the direction the paint is running. It is also important to hold the body between you and a light source. I can sight along the body, as you can see in the silver photo, to see how glossy the paint is getting. With the color coats, I will spray multiple light coats to get the entire body covered, and then will spray on one or two “wet” coats to get the smooth, glossy finish.
Then I started applying masking tape for the actual paint design. I used the 3M 471+ Vinyl tape for the majority of the masking on the body. This is an automotive paint masking tape, available in widths from 1/8” up. In the past I have used 3M 218 Fine Line Tape, which is still available, but has largely been supplanted by the blue 471+.
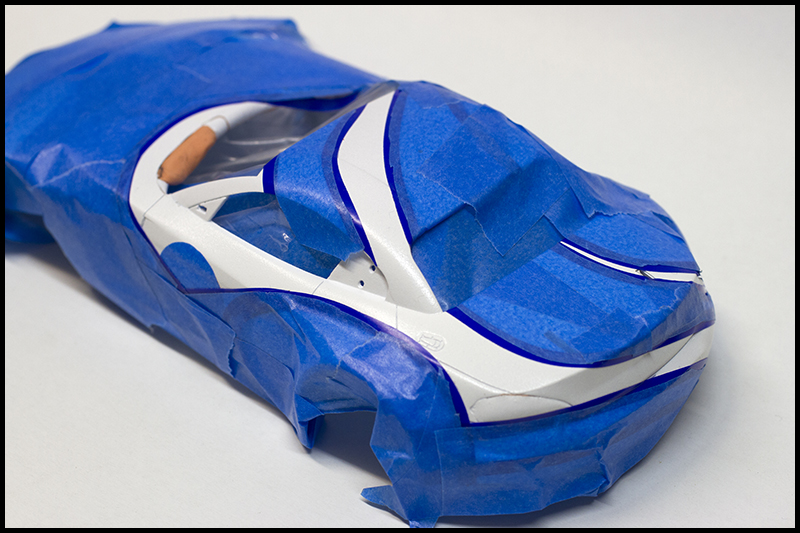
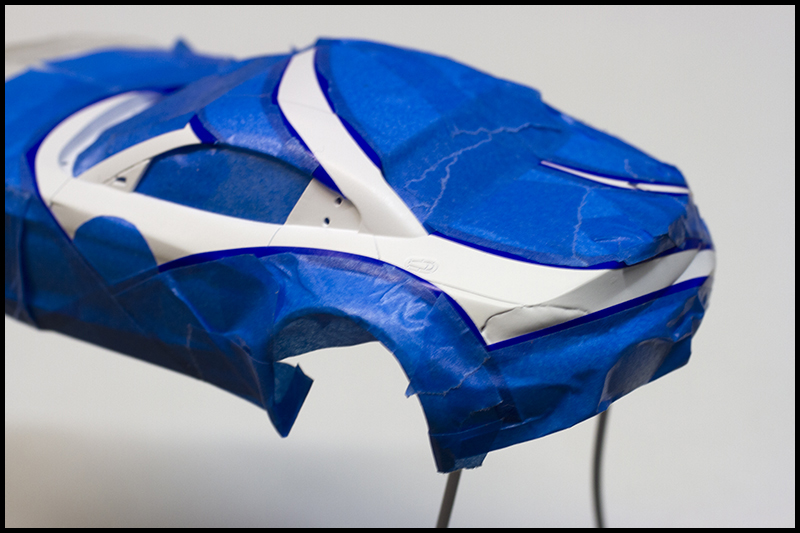
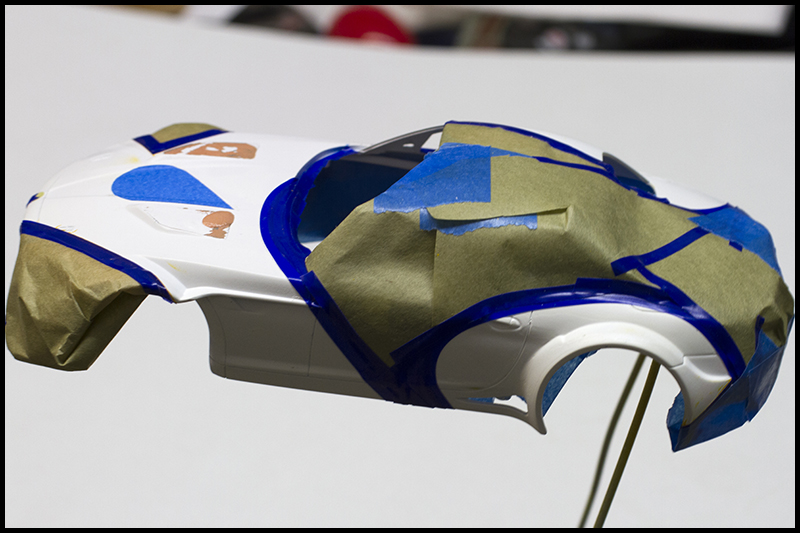
The next color I planned on spraying was the blue areas. Here the edges of the blue areas are defined by the masking tape, and then the rest of the car covered with masking paper and more tape.
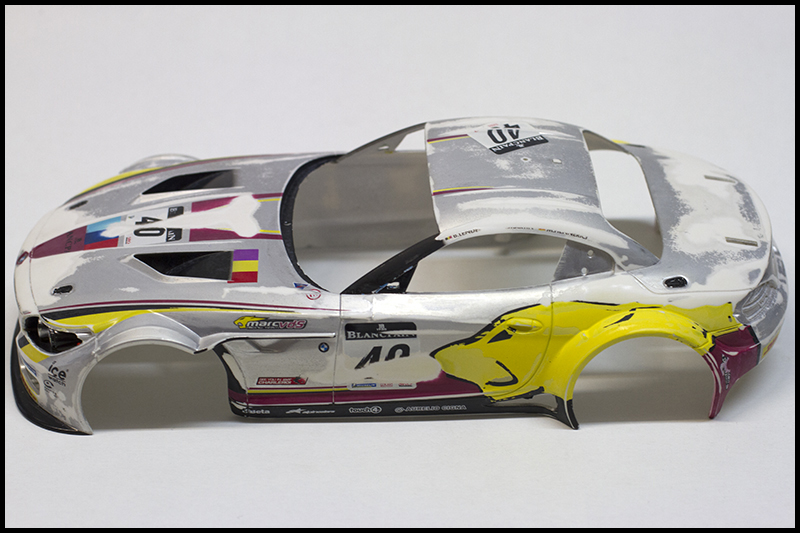
Unfortunately, after spraying this blue color, I was not satisfied with the paint I was using. It sprayed more thickly than I desired and was not sticking well to the base coat. It just wasn’t working. At this point I decided that I needed to start over. To strip off the paint I used Heavy Duty Easy Off Oven Cleaner. I put the body in a plastic tub and took it outside, sprayed the Easy Off liberally on the body, and put on the tub lid. I let it sit overnight, put on rubber gloves, and, then again, outside, went over the body with an old toothbrush. Most of the paint just lifts off. After rinsing, 90% of the sprayed paint was gone. I sprayed another coat, and with the toothbrush and a toothpick, my entire paint job was gone, leaving the original painted body. Whatever the body had been sprayed with at the factory was very tough, as Easy Off usually removes most paints. Most of the white plastic areas are due to my original sanding of the body. I had paid particular attention to the paint edges of the factory paint to make sure there were no ridges; the yellow paint was the top coat and was thicker than the silver paint. After another thorough car wash, the body was ready once more.
This time I used Tamiya rattle-can spray lacquers. Luckily, Tamiya had colors that corresponded closely to my reference photos. I started with Fine Surface Primer in White.
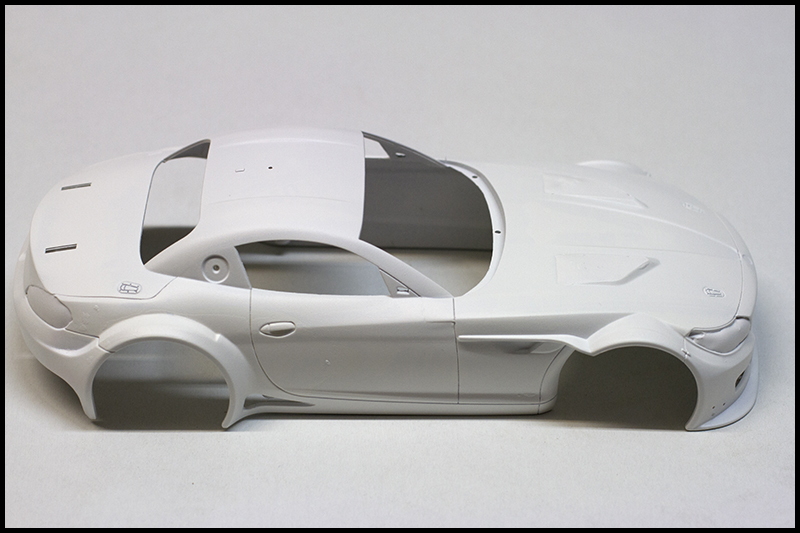 I then sanded this with 1500 grit wet-dry sandpaper. After washing, the body was ready for masking once again. By now, I had a pretty good idea of where the tape should go, but it still required some lifting and re-applying. The vinyl tape is very flexible and is great on curves. You can start it out, pull with one hand, and, while using the index finger of the other hand, press it down. The trick is not too stretch the tape too much, so it will not lift later. If the tape goes into and inside a corner valley, it is best to firm it down into the crease on one side only, using your fingernail or tool, then firm it down on the other side of the corner. This works better than stretching the tape over the valley and then pushing it down into the corner.
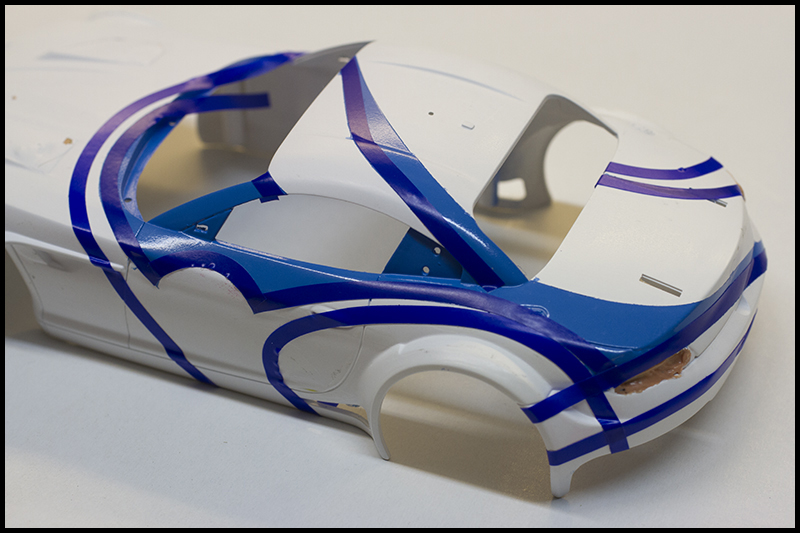
This time I started with the blue color, using Tamiya TS-10 French Blue. Each color panel on the body will need to be masked first on the outside of the color separation line, then have that tape removed and new tape applied over this color, on the inside of the color separation line for the adjacent panel color to be sprayed. I let the blue paint flash off for about 30 minutes before removing the tape, pulling the tape back nearly parallel to the body to avoid lifting any of the paint. It is better to remove the tape while the paint is still flexible, before it dries thoroughly. I then put the body in front of a portable dehumidifier to speed up the drying. After two or three hours, it is ready for more masking. Some people use a food dehydrator to speed the drying; there are videos on the web for this. If only air-drying, I would wait half a day or more before re-masking.
It is important to understand how lacquer paint works. I really like using lacquers; they apply extremely thinly and dry quickly. Because of how thin the coats are, they will show any sand scratches or other problems. Lacquer paint will always soften with lacquer thinner. The solvents in spray lacquer will “melt” the existing layer and the new layer being sprayed will bond to it. This is unlike enamel, which is like paint on glass; it may stick but there is no bonding. The downside of this characteristic is, if lacquer is sprayed on too heavily, it can melt down through all the existing layers of paint. More on this later.
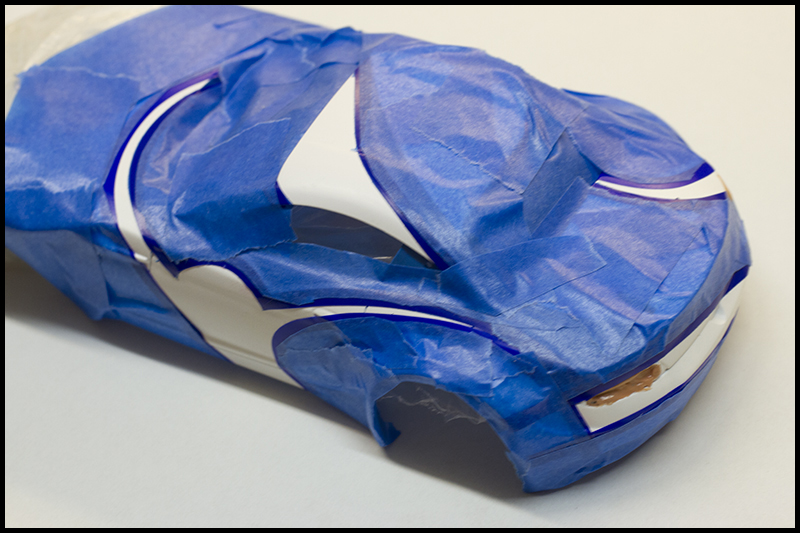
Here, the blue paint layer has been masked, as well as the other borders in preparation for the painting of the white sections. Again, after spraying, I pulled the tape and masking after about a half hour, then more time in front of the dehumidifier. I maintained this procedure throughout the project.
Next, the outer edges of the red sections are masked.
Lastly, the yellow sections are masked and sprayed.
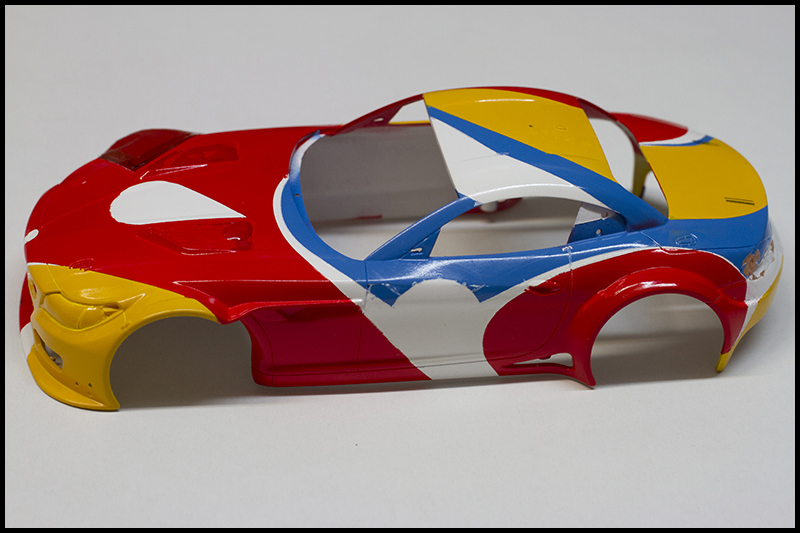
Now, the basic colors have been sprayed. However, I did make a couple of changes at this point. I reshaped the blue area on the roof and also some of the left rear quarter. There were also some areas that needed to be touched up. For some of this I sprayed some paint into a cup and used a small brush to touch up the areas. The touchups melt into the paint and, with a little sanding, blend in invisibly. Some touchup areas required masking and spraying.
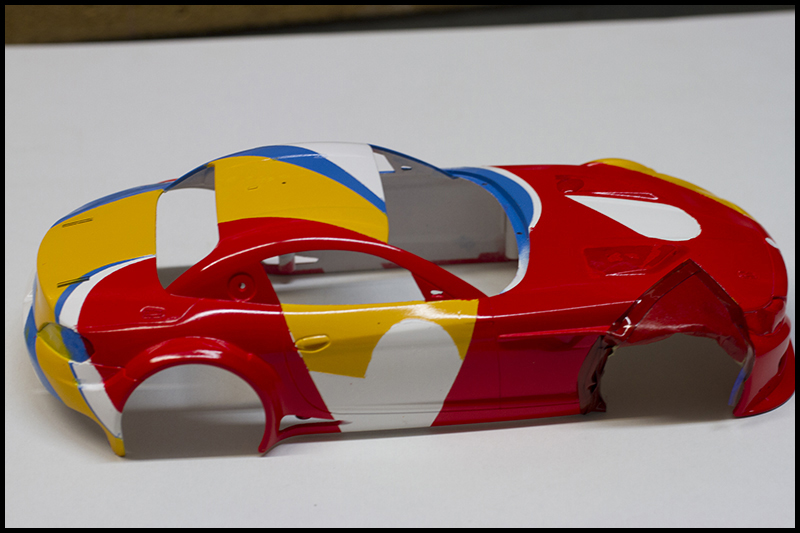
There were slight ridges at the intersections of the various paint colors. Before sanding them down I sprayed a coat of TS-13 Clear over the entire body. Here I ran into a minor problem. I sprayed too heavy a coat and it melted the color layers which caused bleeding at the color edges. This occurred in several places. These areas had to be masked and re-sprayed in the areas of the damage, including all four colors in this shot. The lacquer was very forgiving, in that these extra layers blended in and did not create too heavy a buildup.
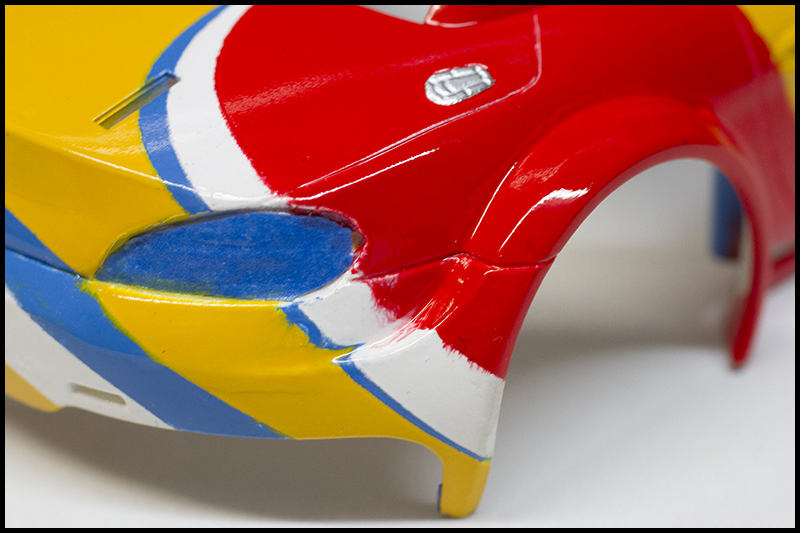
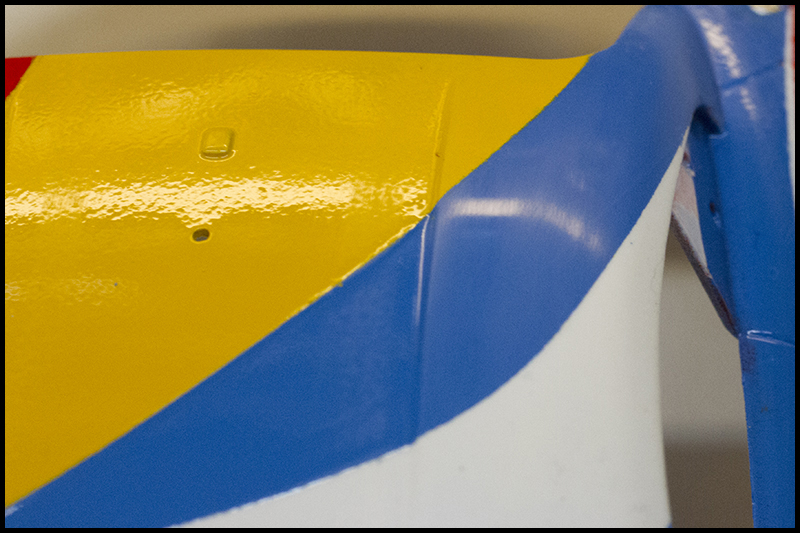
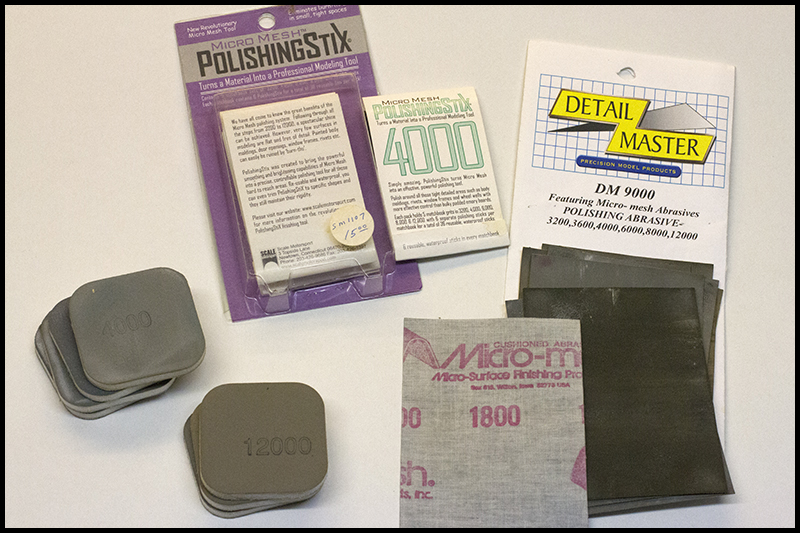
Next I sprayed clear again, using multiple light coats this time. After this paint had dried overnight, most of it in front of the dehumidifier, it was time to color sand and polish the cleared body. As can be seen in the photo below, there was some “orange peel” in the paint, where the paint looks like the outside of an orange. I have already started color sanding the orange peel out of the blue section.The goal is to polish the paint until it is flat and smooth. This can be done in various ways. Rubbing compound, such as Meguiar’s Fine Cut Cleaner or Simichrome polish can be used. Great care must be used around ridges and edges to avoid cutting through the paint. Most of the time I use Micro Mesh Polishing Cloths. With this method there is more control and uniformity in the amount of paint removed. Micro Mesh products are available in a variety of formats, including cloths, foam polishing pads, polishing sticks (like large matches), but I usually prefer the cloths. The Micro Mesh system uses much more precise control of the “grits” in the products, where most sandpapers have a greater variance in grit sizes in any particular grade of sandpaper.
One of the advantages of using a clear coat is, that, while sanding, if you pull any color onto the sanding cloth, you know that you have cut through the clear coat. As long as you are only removing clear, you are safe.
With this system you use graduated grits, starting with whatever grit is required to get a flat finish. Usually I start with 2400 grit, but if the paint was already smooth enough, 3200 will do. Occasionally, with a rougher paint, I might have to start with 1800 grit. As before, this sanding can be done wet or dry. It is super critical to keep the surface clean of sanded paint and grit, either by sanding wet, over a tub of water, or keeping the body and sanding cloths clean by wiping them frequently. The object with the first sanding coat is to get the finish flat. Sanded areas will appear dull; any glossy spots will indicate a dip or divot in the finish. In the photo above the first sanding has been started and the blue area is starting to look flat. You sand until the entire surface is uniformly dull. If you are wet sanding, you must constantly wipe the body with a squeegee or a cloth to see what the finish looks like. Working in small areas at a time, sand back and forth in one direction only, not obitally or randomly. The entire body must be sanded in this manner. In some of the tight areas, the sanding sticks can come in handy.
Once the first grit has been used, you go to the next finer grit, working back and forth perpendicularly to the first sanding. The first grit gets the finish flat; each succeeding grit removes the scratches from the preceding grit. Keep sanding until all the sanding scratches are going in the direction of the second grit.
Keep doing this, through each succeeding grit, 3200, 3600, 4000, 6000, 8000, and finally, 12000, sanding each grit perpendicularly to the previous grit. With the finer grits, there is less chance of cutting through the paint. The last grits of the sanding cloth feel like leather, and it is amazing to see the finish become glossy.
At this point it was time to apply the decals. These came from my parts box. After they dried, I shot some more light coats of clear over the entire body. After drying overnight, I polished out this coat, starting at 3200 grit. The last step was to paint the hood vents and lower windshield cowl semi-glass black. I masked everything off and sprayed the semi-gloss and ……disaster! I didn’t go a good enough job masking and some of the black paint bled through onto the hood, and, it left some “wet” drops that really dug into the red paint, creating black divots. I had to sand the hood and apply multiple coats of red and then polish it out.
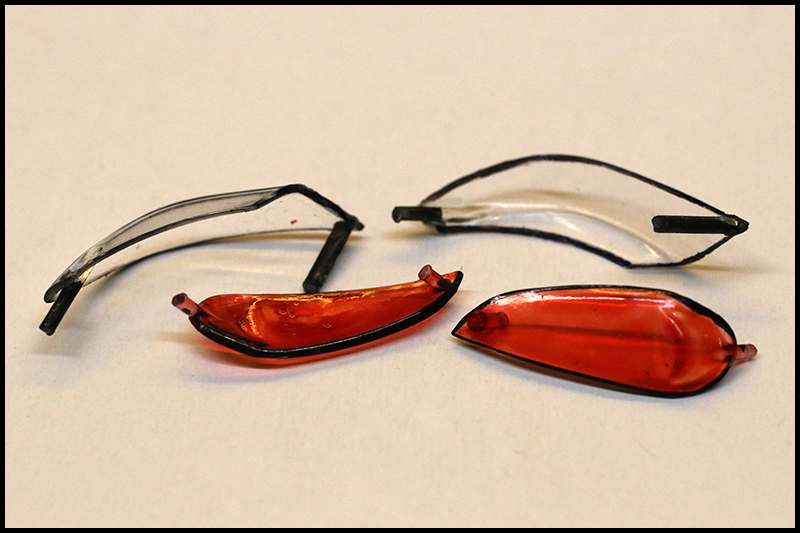
At this point the body looked really good; the paint was super glossy and really smooth. I re-applied all the body parts I had initially removed. The rear taillight covers were not red enough so I brushed on some Tamiya X-27 Clear Red acrylic paint on the inside and used a Sharpie to blacken the edges of the taillights and headlight covers. Its easy little touches like this that can make a model “pop”.
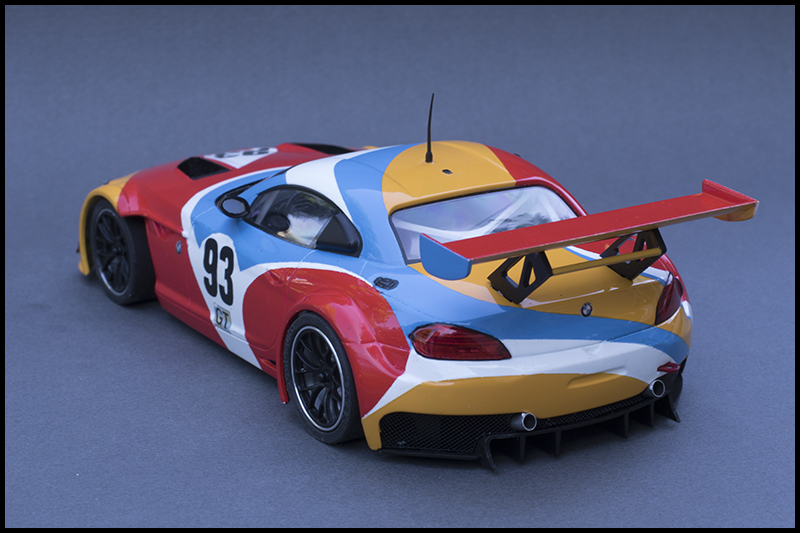
I masked and painted the rear wing in the various colors, clear-coated and polished it. I thought this wing looked pretty vulnerable for the race ahead, so I also assembled the optional carbon fiber rear wing and secured it with Shoo Goo. I applied Meguiar’s High Tech Wax #26 to the body (including the “glass”) and called it done.
Needless to say, I am quite pleased with the result, especially with all the work involved. And the car came through a race in Dallas with only a few scuffs and a loose mirror. Again, preparation to this level for a car that is going to see track time would not usually be required but the work was worth it to me and I enjoyed it a great deal. Hopefully some of the methods that I used may be useful to others.
October 13, 2015 at 3:32 AM #8363freaking gorgeous and you deserved the ConCours award for all your hard work!
"... get on your bad motor scooter and ride!"
Sammy with MontroseOctober 13, 2015 at 3:35 AM #8364Are the exhausts aluminum pipe or the stock plastic?
"... get on your bad motor scooter and ride!"
Sammy with Montrose -
AuthorPosts
- You must be logged in to reply to this topic.

